Wednesday, February 3, 2010

When you make a mistake, pretend you wanted it that way . . .

Soon I will write a blog post on frugal solutions for bread baking. One of my frugal baking strategies is to use Freecycle (www.freecycle.org) or freebies on Craigslist when I can.


Recently I decided I really wanted some baguette pans to try my hand at making baguettes and other skinny breads. The budget is very tight right now, and discretionary spending is not an option. I did my rounds of my favorite thrift stores. Sometimes I really score—it’s almost as if I make a wish and there it is. But maybe I used up my three wishes already (my first clay baker, my enamel roasting pan, my bread slicing guide—nothing over $4)--no baguette pans to be found. Or perhaps not--I DID find the perfect baker’s apron for just $2.99. I have been looking for one, but it wasn’t on my mind that day.


Anyway, I decided to try the local Freecycle, and I got a response. A woman who lives very close to me responded that she had a baguette pan and that the pan must have “good karma” because her mom baked in it all the time. Whoo Hoo! She left it outside on her porch for me and I picked it up the next day.


It feels a little odd going to some stranger’s house in the early morning and taking something from their porch. She lived on a cul de sac and a neighbor was outside. When I approached her porch her dogs barked like crazy. I wonder what the neighbor thought.


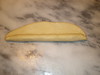
The baguette pan is definitely used. The channels are clean, but a bit “caramelized” from the oven where the baguettes ended. And it’s a patterned aluminum, not the perforated powder coated steel that the newer ones in the store tout as being the best for a crisp crust.


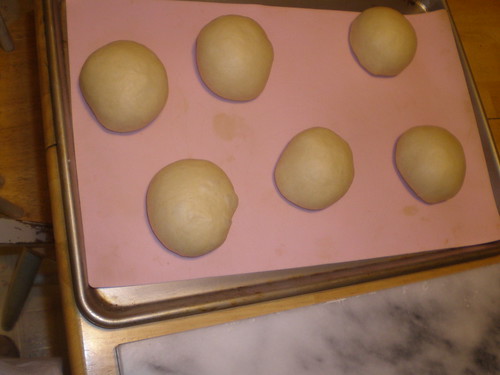
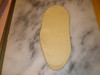
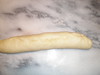
Nevertheless, my first attempt at the baguettes was a qualified success and the pan performed beautifully. I used the Parisian 4-hour baguette from Farmgirl Fare’s site. She raves about these baguettes which are a recipe from Daniel Leader’s Local Breads, but I found them a bit flat and flavorless with the very brief fermentation period (of course, my contrary teenager loved them—despite what I thought was a lot of yeast). The shaping had to be very light-handed and quick, but I was impressed that I managed to get a pretty good baguette shape for my first try. I’m going to try Rose Levy Beranbaum’s poolish baguettes next to see if I can get a better flavor and a more open crumb.


I decided I wanted to make a bread to thank my benefactress for the baguette pans (Note: Freecycle is exactly that—FREE—so thank you gifts are neither expected nor encouraged). I asked her what she might like, but she never responded. I don’t feel confident with my baguettes yet, so I decided to make her one of Rose Levy Beranbaum’s Levy’s Deli Ryes— a little risky because not everybody likes rye, thought it is an impressive bread.


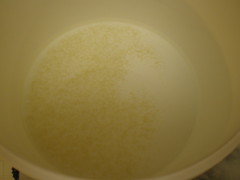
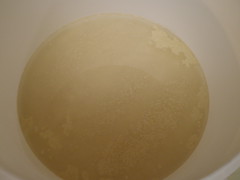
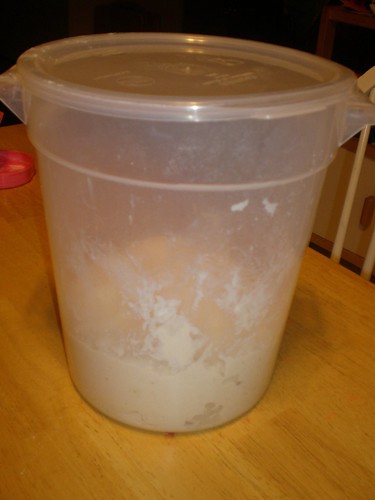
I made the sponge on Saturday night and worked diligently on Sunday to bake this bread. Now, I really hate caraway, and I found making this bread a bit unpleasant the first time I made it because the smell of caraway is quite strong. This time, I skimped on the caraway and I was surprised that I could not smell it, in the dough or the baking. It was the same batch of caraway seeds I’d used before, only about 2 months ago. Does it lose potency that fast? Was my sense of smell off because of the recent upper respiratory stuff?


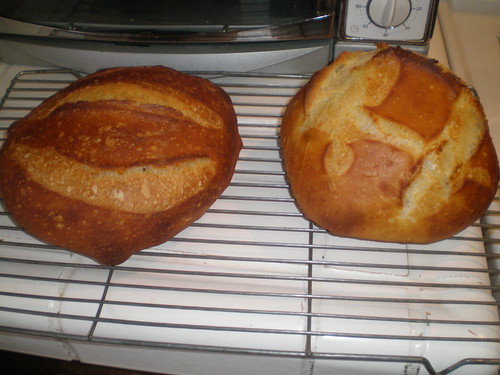
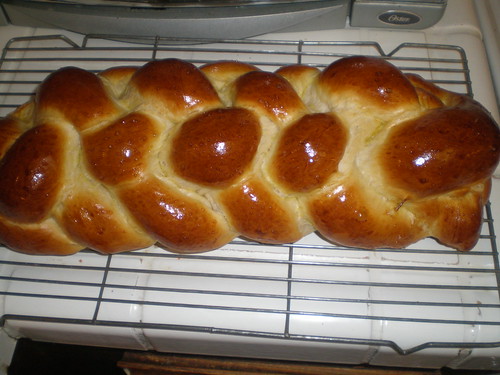
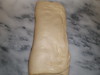
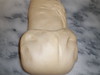
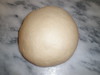
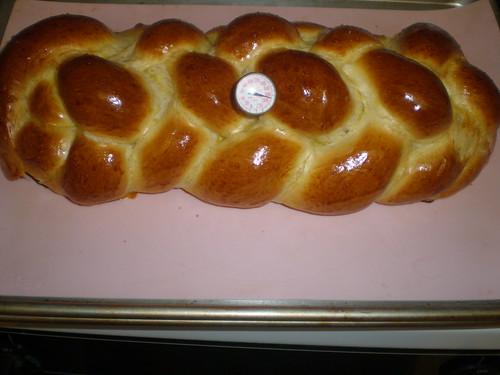
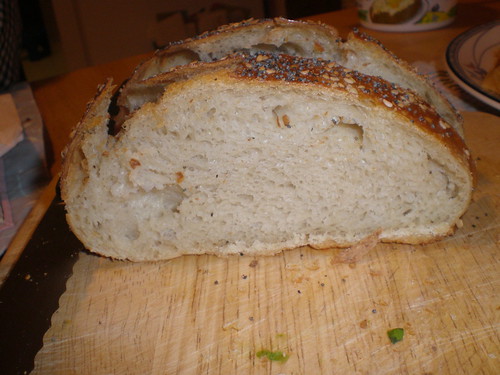
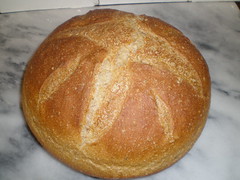
The finished rye bread was spectacular to look at. This is almost a 2 lb loaf. I baked it in my clay baker, and the oven spring is unbelievable. Here is the finished bread:


I didn’t score deeply enough, and the bread was just slightly off kilter in the bottom of my clay baker (no excuse, I put it in the unheated bottom before rising and baking), but it’s still an impressive loaf. And it smelled—good—not bad like caraway. Hmmmm. Maybe I’m getting used to caraway.


Around 1 a.m. it dawned on me--I hadn’t used caraway. The caraway was so stinky I put it in it’s own glass jar in the tea cupboard, where it has to compete with all those smells. The little baggie of seed in my spice drawer was ANISE. Oh . . .


How can I give a gift of deli-style rye with a weird spice in it???


And so, like all good (baking) mistakes, the bread went to the office with a funny disclaimer about mistakes. And a name—“Janknitz’s Anise Rye”


The rye was GOOD! Everyone at the office (including me) loved it, and my office mates were highly amused by my tale of woe. My DH was miffed that I took it to the office because he “would have eaten” anise and rye, but he still has half of the first caraway rye I made in the freezer. (This is a big bread!).


Not only did it taste good, the texture and crust on this bread are awesome even two days after baking. I think RLB scores 100+ with this recipe. And I get to take credit for baking it!


So now I still have to make another rye—with caraway this time—for my baguette benefactress. I won’t have time again for two weeks—a busy weekend ahead.


I sure hope she likes caraway rye . . .


Tuesday, January 26, 2010

Artisan Bread in Five Minutes a Day--Head to Head Yeast Test

I am not a bread snob. I like making any bread that works—short fermentation, long fermentation, no knead, preferments, slow build from a strictly wild yeast starter, you name it, I’ll try it—within my very limited and tight schedule. That means that while I enjoy many bread techniques, I LOVE no knead methods--most especially Artisan Bread in Five Minutes a Day and it’s new counterpart, Healthy Bread in Five Minutes a Day. These REALLY do take only 5 minutes of hands-on time (sorry, but other no knead methods take more!) and I love the results. The doughs are versatile, and just plain FUN.


When I dare admit my love of “5 minute breads” to true breadheads, I can just see the sneers. They do not want to be in any club that admits people like me (that is people who would even think of using “five minute breads”). The biggest criticism I hear over and over is that there is “too much yeast” in the five minute recipes and that the flavor of the bread suffers from lack of a long, slow fermentation. I  admit that the yeast flavor can be quite strong, though I really don’t think the amounts are excessive. A half batch of ABin5 dough (enough to make 2 1+ lb loaves) takes 2 ¼ tsp of yeast (1 package), the same of many of my other yeast only recipes. And there is a long cold retardation in which the dough continues to develop. But still, many complain that the flavor is just not that good because of the yeast and the relatively fast fermentation, including my teenager, who constantly complains the bread is “too yeasty”.


For a while now, authors Zoe Francois and Jeff Hertzberg have been saying that you can reduce the yeast and compensate by giving the dough a longer “counter rise” (that period right after mixing which is usually only 2 hours for their standard recipes). Finally, on this post, the authors spell it all out. You can use as little as ½ tsp of yeast (1/4 tsp for the half batches that I usually make) and still have good results. The compromise is that the rise before refrigeration has to be much longer and resting the shaped loaf before putting it in the oven must be longer as well.


I decided to compare the master ABin5 recipe and the low yeast version in a head to head taste test. I prepared identical buckets of half batches ABin5 master recipe (you can find this recipe on the net here among other places), except that one half batch had only ¼ tsp of yeast (Active Dry yeast in this case) and the other half batch had the 2 ¼ tsp. called for in their standard recipes (REMEMBER: these were HALF batches).

The other change I made was to add only 2 tsp. salt to each half batch instead of the full amount (2 ¼ tsp). I was afraid that the full amount would be too much salt for the lower amount of yeast and I wanted to be able to taste bread and not salt when it came to the taste test phase.


Here is a picture of the yeast in each bucket. You can see that it is significantly less in the “low yeast” bucket. (Because I am using “Active Dry” yeast, I add the yeast to the water first to make sure that the yeast gets hydrated.)

I followed the directions as precisely as possible. The regular yeast bucket got a two hour counter rise before refrigerating. Here is the regular yeast dough right before refrigerating. 


Here is what my bucket of low yeast dough looked like at the same two hour mark, much less activity at that point in time.


The webpage specifies a rising period of 6 to 12 hours before refrigeration for the low yeast version. My low yeast bucket sat on the counter for about 10 hours. The thermostat is set to turn off the heat at midnight and it goes back on around 7 on weekend mornings. That means that it gets down to about 55 degrees in my kitchen at night.


In the morning, there was plenty of activity in my low yeast bucket. You can see all the bubbles and that the amount of dough has increased significantly. To compare it to the regular yeast volume, I measured the distance from the top of the bucket to the surface of the dough in both buckets with a ruler. There was about ½” less in volume (distance of 3 ½ inches from the top) in the low yeast bucket at that point. The regular yeast version was only about 3” from the top, indicating more volume in the identical buckets.


After another 8 hours (dough age is about 20 hours at that point) the dough in both buckets has fallen slightly. Now there is only a ¼ inch difference in volume between the low yeast and regular yeast versions. On the next day when I took out dough to bake, it was about the same.


 The following day (about 36 hours after mixing the dough), I made two identical 1 lb boules, weighing the dough so all things would be equal. I did not make them at the same time. According to the web site, Jeff recommended a 2 hour final proof on the counter before baking the low yeast version, while the regular version needs only about 40 minutes. So I made my low yeast boule and set the timer for 1 hour, 15 minutes. When the timer went off, I turned the oven on to preheat, and made the regular yeast boule so that they could be baked simultaneously on the stone in my oven.


Jeff suggests a 2 hour counter "rest" after shaping the low yeast loaf, while 40 minutes or so is standard for the Master recipe.  I think that 2 hours was a bit too long for the low yeast boule’s final proofing. It flattened quite a bit, and—as you will see in the crumb shot below—there were large surface air bubbles that indicate over-proofing. I wanted to follow the directions exactly this time (and it was necessary to follow the timing recommendation so that I could have both boules bake together), but I will cut back a little on the proofing next time when using low yeast.


I covered each boule with an upside down bowl while proofing and they were in roughly the same place in the kitchen so that the temperatures were the same.


When the two hours were up, I scored the boules differently, so I could tell one from the other. The regular yeast boule got a cross hatch design, while I did a 3 slash design on the low yeast boule (I also chose that design because it was less likely to deflate an over-proofed boule).


I placed both boules in the oven on my stone and baked them “en cloche”—that is under my large roasting pan bottom. The low yeast boule was a little too close to the edge and a part got trapped under the edge of the pan, burning in the process. But it didn’t really affect the rest of the boule.


After 17 minute I removed the roasting pan “cloche” and continued baking for about 14 more minutes. I checked the temperature of each loaf at that point. The regular yeast loaf was about 205 degrees, the low yeast loaf was about 210 (because it is flatter, I think the heat penetrated more quickly). Both came out “singing”.


As you can see, the oven spring on the regular yeast loaf (on the right) is truly amazing. While there was a little oven spring on the low yeast loaf, it was not very much. That may have as much to do with overproofing as the amount of yeast, however. I’m eager to bake off the rest of this batch of dough and see if there is a difference when the dough has not been over-proofed.


The low yeast version was noticeably more caramelized than its regular yeast counterpart and had more surface blisters from the heat. The crust of the low yeast version was tastier and remained more crisp the next day when we finished off both breads. I liked the flavor of the low yeast version’s crust a lot.


The crumb shot clearly shows that the low yeast version (on the left) was over-proofed. Note the “mouse-sized holes” on the sides. Nevertheless, the rest of the crumb was nicely open and the texture was very nice. It was a bit lighter than the regular least version in texture—not so wet and glossy. My daughter especially liked the crumb better.


FLAVOR TEST
My “judges” consisted of my family. My DH is a wine connoisseur and has a very good palate, but he was a reluctant participant. My teenager is my biggest critic, and my little one my biggest fan (for now!). I did a somewhat blind taste test by slicing the bread into identical-looking pieces and placing the pieces on two different colored plates. Here are the responses:


Husband: "The blue plate bread has more depth of flavor and a nicer crust. I prefer that one".


Teenager: "The blue plate bread is better. It doesn’t taste all yeasty and it tastes just like Mary’s Pizza (local pizza chain) bread sticks. I love those bread sticks. That is good bread. The white plate bread is too yeasty—I don’t like the flavor".


Little one: "I like the white plate bread. It has more flavor".


Me: "The blue plate bread’s crumb (low yeast--you guessed it) definitely had a lighter texture and I think the taste is a bit sweeter overall, with a pleasant, crisp and crackly crust".


You can smell the yeast in the regular yeast bread even at a distance of a few feet. The crumb is denser and gummier—the mouth-feel is not as pleasant and the flavor is “earthier.


And the winner is . . .


The low yeast version. By a “landslide”!


Conclusion:
From now on, I intend to reduce the amount of yeast I use in my ABin5 and HBin5 breads and give the batches of dough a long rise on the counter (overnight, or all day) before refrigerating. More experimenting will have to be done to determine the ideal amount of times for counter resting shaped loaves before baking. I’ll post back when I have more experience with that.


So now I have a response to breadheads who complain there is too much yeast in five minute doughs—just reduce the dough and increase the rise! It STILL takes only 5 minutes of hands on time and the results are stunningly good.

Wednesday, January 20, 2010

MY FAVORITE CHALLAH

I’ve noticed my taste for challah has changed (evolved?) over the years, but my current favorite challah is this one from Rose Levy Beranbaum, based on a similar challah from Maggie Glezer.


This challah has a great flavor, a light and airy crumb, and the dough is easy to work with. This challah is made with a firm sourdough starter as a sort of pate fermente (old dough) to condition the dough, giving it more moisture, a longer shelf life, and great elasticity.


I usually make this dough about once a month and shape the batch of dough into four small challahs for future Shabbat dinners. This size is just perfect for our family at dinner. The larger challah above was made for a religious school pot luck dinner.


This giant seeded challah was made from a double recipe for a bar mitzvah. This is the maximum size my oven and baking sheets can handle.


I took pictures this time of almost all the steps:


This is how my firm starter looks when freshly fed and ready to be refrigerated:


I feed 20 grams of old starter with 40 grams of water and 60 grams of flour (1:2:3 feeding ratio) and knead it until the flour is well incorporated. Then it goes into the fridge for up to a month.


This is how the starter looks after a month in the fridge. I take it out the evening before baking and let it sit on the counter until morning.


By morning, the starter has doubled and softened into this:


The starter is weighed out and mixed with water, then allowed to sit for 30 minutes to soften and dissolve.


The rest of the dough is mixed, kneaded, and set aside to for the first stage of bulk fermentation.


I mark the time on the outside of the bucket with a dry erase marker.


After an hour and a half, the dough was ready for the first of what Rose calls “business letter folds”. (These are more commonly referred to as “stretch and folds”).

Note that I do not put any extra flour on my marble board. The bucket the dough rose in was sprayed with olive oil, and there’s just enough oil clinging to the dough to keep it from sticking. After the stretch and folds, the dough undergoes a second bulk fermentation.


For a single challah, I divide the dough into six equal balls. Each ball is flattened and rolled tightly into a tapered rope (Aaaggghhh! I forgot to take a picture of the rope). Note that before rolling it out into a rope I tightly pinch the seam just as you would do for a baguette.

This challah is a six strand braid. I always need to follow directions for a six strand braid, I can never remember how to do it.


I give the dough two egg washes. One immediately after shaping, the second after the dough has risen, right before baking.


The challah is ready when it’s nicely browned and the inner temperature measures at least 185 degrees Fahrenheit.


Sorry, no crumb shot—this challah will be frozen until the potluck on February 5th. I wrapped it tightly in foil and then plastic cling wrap before freezing. On the appointed day, I will remove the challah from the freezer in the morning, leaving it tightly wrapped. It will thaw slowly on the counter. The theory behind leaving it wrapped is that the condensation from the thawing bread will be reabsorbed by the bread after thawing is complete. This way the thawed bread will not be dried out. For that freshly baked taste, place the challah—loosely wrapped in foil--in a medium oven (320 – 350) for 10 to 15 minutes.


Taken one step at a time, nothing here is difficult—and the results are spectacular! Give it a try.


[Submitted to Wild Yeast's Blog for her Yeast Spotting Page]

Friday, January 15, 2010

Healthy Bread in Five Master Dough

Here is my first post for the Healthy Bread in Five Minutes a Day Bakealong:


This is my second try at the master recipe in HB in 5. I made a bucketful immediately upon receiving the book, and set about playing with some of the more visually appealing breads in the book.


First up was an epi. It came out pretty enough, but the “ears” were dry and chewy. Not very good.


Then I tried some baguettes. Dry and chewy again. I made skinnier baguettes and tried placing big garlic cloves along their lengths. The garlics popped out and the bread was again dry and chewy.

Blech. Maybe I don’t like this healthy dough.


There was still enough left for a . . . something. I decided to try the “Moon and Stars” bread because it was kind of cute. I made it and left it on the counter, not having much hope that it would be the tasty bread our family enjoys.


My husband decided to serve it with dinner. He warmed the bread and cut it into oval shaped slices served with butter along with our winter soup. The teenager (my biggest critic) said “Where did you get this bread? This is really good bread!” Usually she complains that my “Five Minute” breads are too yeasty, and moans that I force homemade bread on her when everyone else has storebought.


So, lesson learned was that the HB master recipe is best in “fat” breads that have a lower ratio of crust to bread.


Here’s my “Moon and Stars” bread for the first official round of the bakealong. I didn’t do such a great job with shaping. Instead of a curved crescent, it’s more like a half circle. And the decorative side cuts close themselves up during the oven spring. This bread was given an egg wash and sprinkled with poppy seeds and sesame seeds.


Oh my! What oven spring!!!! I made this bread in my clay baker. I preheat the lid in the oven, but let the cold dough sit in the bottom on the counter to “rest” before baking. In this case the dough sat on the counter about 1 hour and 45 minutes before baking. When it’s time to bake, I cover the dough with the hot clay baker lid and bake for 17 minutes. Then I remove the lid and bake 17 more minutes. The crust was crisp and crackly. It was literally singing—loudly—when I took it from the oven. I’ve never experienced a “singing” crust using an egg wash before.


 Here’s the crumb shot I manage to take before the bread was devoured. My little one said “this bread tastes too good to be healthy.” The teenager liked it UNTIL she learned that it was that five minute bread again, and then she back pedaled and said that it tasted good only with butter, but she wouldn’t let butter past her ballerina lips. She must have hated it, she left two whole bites of crust from a generous piece on her plate. ;o)


This was good bread, folks!


Now, a couple of other confessions:


1) It’s made with bleached flour. Other HB bakers know why, but I’m not going to embarrass myself to the whole world here on my very own blog. The bleached flour did not seem to hurt this bread—if anything it has a more tender crumb than my first batch.


2)I made up the dough and forgot about it. Went to bed, and it never got in the fridge until the next morning. Didn’t seem to hurt anything—in fact the dough tripled in volume—and maybe that longer rise helped the texture as well.


Here’s the dough when I first mixed it up:


Here’s the dough after about 1 hour:


Here’s the dough the next morning after sitting out all night


Still, you won’t see me making epis or baguettes with this dough. I’ll save that for the white breads from now on. But I do like it for “fat” (in shape, not ingredients) breads.


Sunday, January 3, 2010

Being Productive

I've been very sick with an asthma flare up and spent the better part of two weeks lying around, coughing and wishing I felt better. I really couldn't bake very much, and our supplies of daily breads are almost completely gone. I didn't complain when my husband bought himself some multi-grain bread, because I just wasn't up to making it.

The many drugs I'm on finally started kicking in yesterday. My family was away, so very slowly I did some baking. I do mean slowly. I'd mix the dough, then rest. Knead the dough (by machine), then rest. Working slowly like that, I managed to make my challahs for the month. I make a single recipe of Rose Levy Berenbaum's sourdough challah into four small challahs. They came out beautifully.

I also baked up the last of the multi-grain cereal HBin5 dough. It was a brick--and got promptly tossed in the trash. I will try this again for the HBin5 baking challenge, but I was not impressed with this dough. It was heavy and tasteless.

Last night I started the dough for Rose Levy Beranbaum's banana feather bread and Peter Reinhart's Bagels from Artisan Breads Every Day. The banana feather bread is on it's second bulk fermenting rise, but the bagels are done.

I must say the bagel recipe from that book is incredibly easy. You mix up the dough the night before. The bagels are supposed to be shaped first, but lacking room in the fridge I decided to shape after the overnight retardation.

It was a bit hard to do the shaping with the cold dough--that dough tends to be a bit tough. I'm sure it would have been easier in the first stage. But beyond that, this recipe was very easy to do and the results were wonderful--the bagels are great. They are not cakey or bready like grocery store bagels. They are chewy and solid, like a bagel should be.

And I still have enough energy to write this post. It feels good to be productive again, and it's how I know I'm going to be OK. I'm still hacking like an old smoker (I never so much as took a puff of a cigarette in my life, but both parents smoked a lot around me when I was growing up), I have no voice, and little stamina, but I'm going to be OK. The bread tells me that.

Saturday, January 2, 2010

Yogurt, Streamlined

OK, so I know this is called "Baby Bobby's BREAD Blog", but my bread baking has led me to branch out into a few other directions, and one of them is making homemade yogurt. It's not a far stretch--we're still dealing with fermentation and similar lactobacilli.

If you search for homemade yogurt recipes online you will find many, but I think that I have streamlined the process significantly (using the microwave and a single container for all steps). Homemade yogurt is fun, easy, and very economical--a serving costs about the same as a glass of milk. It's delicious, and you know exactly what is going into your body or your children's.

The biggest issue is how to "incubate" your yogurt. The mixture must be held at a warm temperature for several hours (8 to 12). You can do this in a commercial yogurt maker, or try one of the suggestions below.

Here's my streamlined method. You will need:

~Milk (any kind you prefer, I use whole milk)
~Yogurt (you need a small amount of LIVE CULTURE plain yogurt to inoculate your first batch. After that you can save some of your homemade yogurt for the next batch)
~Powdered milk (optional--this helps thicken the yogurt)

I make about 3 cups of yogurt at a time. You can make more or less, depending on your container. I like to do it all in the microwave, using a quart-sized wide-mouthed glass canning jar. This is part of what makes it so easy--only one container is dirtied. Alternatively, you can use a large microwave safe bowl or a pyrex measuring cup (we have a pyrex measuring cup that holds 2 quarts and it's safe and easy to use). You may also heat the milk over the stove with a double boiler.

CAUTION: A glass container of 180 degree milk is HOT enough to cause serious burns!!!! Take adequate precautions. Use oven mitts or insulated rubber gloves to handle the hot container. Treat the container gently and do not set it down on a cold, wet surface. Use only canning jars that can withstand the heat--don't use fancy, decorative non-canning jars or reuse commercial jars unless you are certain they are not going to explode from the heat!

Make sure that everything is clean. Some sites recommend sterilizing everything, but I haven't had any trouble with just usual kitchen cleanliness. I wash my quart jars in the dishwasher between uses. And it's OK to use metal utensils--it will not hurt the yogurt or the utensil. However, the acid in the yogurt can be corrosive over time, so don't try to store it in a metal container.

Step 1: Bring the milk to 180 degrees F. I fill my quart jar with three cups of milk--any more and it would overflow during heating. That takes about 5 minutes to heat to 180 degrees in my microwave. You will need to experiment with your own microwave and container to determine how long to get to that temperature. Or heat the milk in a double boiler. Use your thermometer to check the temperature. Yogurt will not work if the milk gets too hot.

Step 2: Once the milk has reached 180 degrees, remove from the heat source. Add powdered milk (I use about 1/3 cup for 3 cups of milk). Allow the milk to sit at room temperature until it reaches 120 degrees. This takes about 20 minutes for a quart-sized jar.

Step 3: Mix in the yogurt culture. For Every two cups of milk, add about 2 TBSP of yogurt with active cultures. Stir gently. Don't add the culture until the milk has cooled to 120 or you will kill it.

OK, so now all you have to do is to "incubate"--that is to try to keep the mixture warm so the yogurt has time to do its thing. Here are some easy, low tech solutions:

1. I have a thermal "Lunch Jar" that my quart canning jar fits inside with a little bit of room. I preheat the thermal jar with warm water and then pour it out before slipping in the sealed quart jar of yogurt mixture. Because there is space on the sides, I wrap the quart jar with wash cloths for added insulation. Cover the lunch jar tightly. My lunch jar is not a fancy vacuum thermos, so I wrap the lunch jar in an insulated lunch bag for further insulation. Set aside in a draft free spot overnight, 8-12 hours.

2. If you have a wide-mouth vacuum thermos, that's an excellent incubator. Preheat the thermos with some warm water for about 5 minutes before filling it with the yogurt mixture.

3. Crockpot two ways:
a. Preheat the crockpot on low while you are making the yogurt mixture. Turn the crockpot OFF and unplug it. Pour the milk mixture in the crockpot, cover, and wrap the crockpot up in blankets and towels to insulate it. Wait 8 to 12 hours. This is especially good for large quantities of yogurt.
b. Preheat the crockpot as above. Turn the crockpot OFF and unplug it. Wrap your sealed quart jar of yogurt mixture in a thick towel and place it in the crock. Put the cover on the crockpot and wait 8 -12 hours.

4. If you look around on the web, there are other incubators you can try, like a heating pad in a styrofoam cooler, the oven turned on very low, etc. I prefer the thermal jars--you can pick up a thermal water jug for just a few dollars and that will work fine. No electricity and no close monitoring needed. I've also been thinking that some of the ice buckets you can pick up inexpensively at thrift stores would make good incubators. And of course, a commercial yogurt maker works just fine.

The longer you incubate, the thicker the yogurt, but I do find my homemade yogurt is generally thinner than commercial yogurt. I strain the yogurt in a permanent coffee filter with a plastic mesh for about 2 hours to remove some of the liquid whey and thicken it up. If you want Greek-style yogurt or yogurt cheese, just strain for a longer time period. You can save the whey and use it in bread baking--it acidifies and conditions the dough very nicely. Ha, there is a bread baking angle here!

Before eating your yogurt, fill a small plastic container (I always fill two) with some of your new yogurt to use to inoculate the next batch. You can freeze this for later use. I got some great small plastic lidded containers from the Dollar Store that each hold the exact amount needed for a batch of yogurt.

Flavor the yogurt however you like. We like honey or jam in our house. The longer the yogurt incubates, the more sour the flavor, so you will want to cut the flavor with at least a little sweetener to get your kids to eat it. You can also add pureed fruit. This yogurt is great with homemade granola.

Enjoy!

Revival

OK, time to revive this poor, neglected blog.

Fortunately, I have taken much better care of Baby Bobby than this blog, though he's been sitting in the fridge these past two weeks while I try to get over the plague of 2009. A little cold turned into a whopper of an asthma flare up and I have not been in much shape for major baking. Here's hoping the New Year will bring me some better lungs.

I did manage to do a little baking on NY Eve day, thanks to AB in 5. I wanted to contribute to our annual "hors d'oeuvre" dinner. We're quiet old fogies with school age kids, so our big whoop for NY's is just to have an hors d'oeuvre dinner and sparkling ciders, wait until midnight, kiss and go to bed. Nothing like the wild NY Eve bashes my parents attended when I was the age of my kids, but safe, sane, and spent with our favorite people on earth.

Usually our hors d'oeuvres come from the frozen section of Trader Joe's (they have these cheese tarts that are to die for, but they were out of them--boo hoo!). But I was inspired to make a mushroom "strudel" to add to our feast.

Whole Foods sells mushroom strudel around the holidays in their deli section. It is an incredibly buttery soft dough wrapped around a savory mushroom filling and I love it. But, it costs almost $10 a pound! I treated myself to a small little slice the other day, and my purchase was almost $2 and not enough to satisfy since it was SO good.

So I set about making my own. It's not exactly the same, but delicious all the same and an acceptable substitute. Even better, the entire thing cost less than that single slice from Whole Foods.

Sorry I did not take pictures--there just wasn't enough energy for anything extra--I was wiped when the deed was done, but I did feel pretty good about accomplishing something for the first time in several days. Here's how I made it:

I made a 1/3 batch of Artisan Bread in Five Minutes a Day's Brioche Dough. Sorry, I respect their copyright so I will not post the recipe here. You may be able to find it elsewhere on the web, or purchase the book or check it out from the library. Or you can use your own favorite brioche dough which will work fine, but I guarantee will not be as easy.

Since I was reducing the batch of dough, I made one simple change. The original recipe calls for 8 eggs (While this sounds like a lot, this amount will make at least 4 one pound loaves and the dough can be stored and used during the course of a full week). It's difficult, of course, to divide 8 eggs by three, although it can be done. But to reduce the wetness of the dough just a little for ease in handling, I added only 2 eggs to my 1/3 batch. This worked out great. The small amount of egg wasn't missed at all, and the dough handled like a dream.

The beauty of AB in 5 doughs is that you can really, truly, whip up the dough in around 5 minutes. It's a one bowl operation, and there is NO kneading. Just whisk all the ingredients together, and time does the rest of the work. So in the morning (fairly late in the morning as it was) I made my batch and sat it on the counter for it's two hour rest. Then I went to take a two hour rest as well ;o). This was followed by about 2 hours in the fridge. If you are going to roll out this dough as I did, the refrigerator time is crucial to make the dough easy to handle. If you are going to do something else with the dough, I think it's OK to use as soon as the 2 hour counter rise is done.

Now for the filling:
1/3 cup of minced onion, scallion, or green onion
1 clove minced garlic
1 TBSP butter
1 8oz package of Mushrooms (sliced)
1 tsp Herbs de Provence
Salt and Pepper to Taste
1 TBSP Cognac or dry sherry (or white wine)--Optional
1 TBSP flour
4 TBSP freshly grated Parmesan cheese

Saute the onion and garlic in the butter until just softened. Add the mushrooms and cook gently until the mushrooms have released their moisture and it has been partially evaporated. Season the mushrooms and add the cognac. Continue to cook gently until most of the cognac has evaporated. Add in the flour and cheese and mix well. Remove from the heat as the cheese melts and allow the mixture to cool.

Back to the dough:
Roll the dough out. My mistake was leaving it a bit too thick, it should be about 1/8" thick. I did not want a spiral roll (like a cinnamon roll). Instead, I wanted a nice layer of dough around a center of mushrooms. I left a double layer of dough under the mushrooms, and that proved to be too thick. Next time, a single layer all around.

Lay a line of mushrooms about 1" from the edge and roll the dough around it, cutting the dough off where the edge meets. Pinch the seams shut and lay, seam side down on a piece of parchment or silicone mat.

Turn the oven on to 350 and allow the roll to sit while the oven preheats. When the oven is at the right temp, brush the mushroom strudel with egg wash and bake for about 35 minutes until golden brown.

My teenager hates mushrooms, and when she heard I was making a strudel she begged for an apple strudel. I had enough dough left over that I decided to surprise her with an apple version as well.

For the apple filling:
1 apple, finely chopped
A few drops of lemon juice
Cinnamon Sugar to taste

I laid the apple mixture out the same way I had done the mushrooms. I dotted the apple mixture with little bits of butter, apple pie style. Then I rolled it up and gave it the same egg wash. I sprinkled the top with more cinnamon sugar, and baked it along with the mushroom strudel.

CAUTION: The juices from the apple did leak a bit.

I did not taste the apple strudel because I am the only American in the world who hates apples, but my family loved it.

The mushroom strudel was not exactly like the WF version, but very delicious just the same. I'll be making this again for special occasions (it will be a great "take along" for pot lucks). Best yet, it was SO easy that even a wheezing grump can make it.