Soon I will write a blog post on frugal solutions for bread baking. One of my frugal baking strategies is to use Freecycle (www.freecycle.org) or freebies on Craigslist when I can.
Recently I decided I really wanted some baguette pans to try my hand at making baguettes and other skinny breads. The budget is very tight right now, and discretionary spending is not an option. I did my rounds of my favorite thrift stores. Sometimes I really score—it’s almost as if I make a wish and there it is. But maybe I used up my three wishes already (my first clay baker, my enamel roasting pan, my bread slicing guide—nothing over $4)--no baguette pans to be found. Or perhaps not--I DID find the perfect baker’s apron for just $2.99. I have been looking for one, but it wasn’t on my mind that day.
Anyway, I decided to try the local Freecycle, and I got a response. A woman who lives very close to me responded that she had a baguette pan and that the pan must have “good karma” because her mom baked in it all the time. Whoo Hoo! She left it outside on her porch for me and I picked it up the next day.
It feels a little odd going to some stranger’s house in the early morning and taking something from their porch. She lived on a cul de sac and a neighbor was outside. When I approached her porch her dogs barked like crazy. I wonder what the neighbor thought.
The baguette pan is definitely used. The channels are clean, but a bit “caramelized” from the oven where the baguettes ended. And it’s a patterned aluminum, not the perforated powder coated steel that the newer ones in the store tout as being the best for a crisp crust.
Nevertheless, my first attempt at the baguettes was a qualified success and the pan performed beautifully. I used the Parisian 4-hour baguette from Farmgirl Fare’s site. She raves about these baguettes which are a recipe from Daniel Leader’s Local Breads, but I found them a bit flat and flavorless with the very brief fermentation period (of course, my contrary teenager loved them—despite what I thought was a lot of yeast). The shaping had to be very light-handed and quick, but I was impressed that I managed to get a pretty good baguette shape for my first try. I’m going to try Rose Levy Beranbaum’s poolish baguettes next to see if I can get a better flavor and a more open crumb.
I decided I wanted to make a bread to thank my benefactress for the baguette pans (Note: Freecycle is exactly that—FREE—so thank you gifts are neither expected nor encouraged). I asked her what she might like, but she never responded. I don’t feel confident with my baguettes yet, so I decided to make her one of Rose Levy Beranbaum’s Levy’s Deli Ryes— a little risky because not everybody likes rye, thought it is an impressive bread.
I made the sponge on Saturday night and worked diligently on Sunday to bake this bread. Now, I really hate caraway, and I found making this bread a bit unpleasant the first time I made it because the smell of caraway is quite strong. This time, I skimped on the caraway and I was surprised that I could not smell it, in the dough or the baking. It was the same batch of caraway seeds I’d used before, only about 2 months ago. Does it lose potency that fast? Was my sense of smell off because of the recent upper respiratory stuff?
The finished rye bread was spectacular to look at. This is almost a 2 lb loaf. I baked it in my clay baker, and the oven spring is unbelievable. Here is the finished bread:
I didn’t score deeply enough, and the bread was just slightly off kilter in the bottom of my clay baker (no excuse, I put it in the unheated bottom before rising and baking), but it’s still an impressive loaf. And it smelled—good—not bad like caraway. Hmmmm. Maybe I’m getting used to caraway.
Around 1 a.m. it dawned on me--I hadn’t used caraway. The caraway was so stinky I put it in it’s own glass jar in the tea cupboard, where it has to compete with all those smells. The little baggie of seed in my spice drawer was ANISE. Oh . . .
How can I give a gift of deli-style rye with a weird spice in it???
And so, like all good (baking) mistakes, the bread went to the office with a funny disclaimer about mistakes. And a name—“Janknitz’s Anise Rye”
The rye was GOOD! Everyone at the office (including me) loved it, and my office mates were highly amused by my tale of woe. My DH was miffed that I took it to the office because he “would have eaten” anise and rye, but he still has half of the first caraway rye I made in the freezer. (This is a big bread!).
Not only did it taste good, the texture and crust on this bread are awesome even two days after baking. I think RLB scores 100+ with this recipe. And I get to take credit for baking it!
So now I still have to make another rye—with caraway this time—for my baguette benefactress. I won’t have time again for two weeks—a busy weekend ahead.
I sure hope she likes caraway rye . . .
Showing posts with label Rose Levy Beranbaum. Show all posts
Wednesday, February 3, 2010
Wednesday, January 20, 2010
MY FAVORITE CHALLAH
I’ve noticed my taste for challah has changed (evolved?) over the years, but my current favorite challah is this one from Rose Levy Beranbaum, based on a similar challah from Maggie Glezer.
This challah has a great flavor, a light and airy crumb, and the dough is easy to work with. This challah is made with a firm sourdough starter as a sort of pate fermente (old dough) to condition the dough, giving it more moisture, a longer shelf life, and great elasticity.
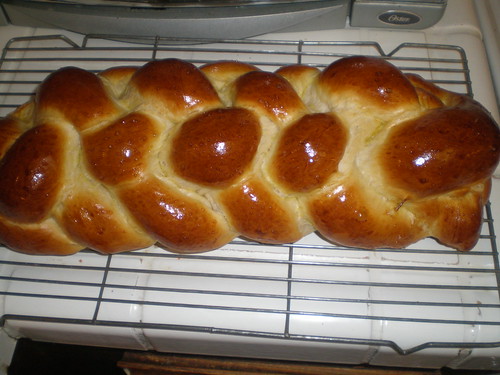
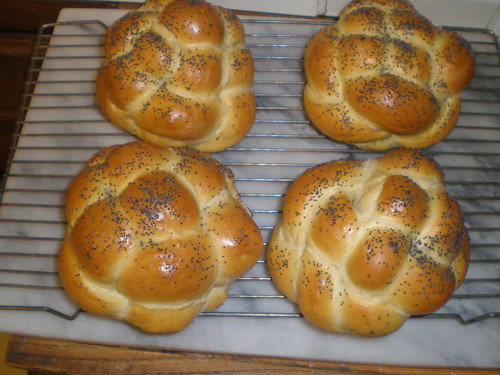
I usually make this dough about once a month and shape the batch of dough into four small challahs for future Shabbat dinners. This size is just perfect for our family at dinner. The larger challah above was made for a religious school pot luck dinner.
This giant seeded challah was made from a double recipe for a bar mitzvah. This is the maximum size my oven and baking sheets can handle.
I took pictures this time of almost all the steps:
This is how my firm starter looks when freshly fed and ready to be refrigerated:
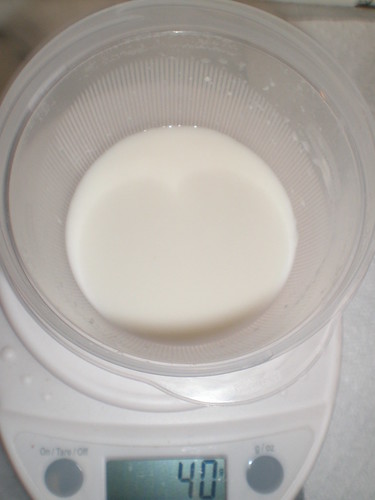
I feed 20 grams of old starter with 40 grams of water and 60 grams of flour (1:2:3 feeding ratio) and knead it until the flour is well incorporated. Then it goes into the fridge for up to a month.
This is how the starter looks after a month in the fridge. I take it out the evening before baking and let it sit on the counter until morning.
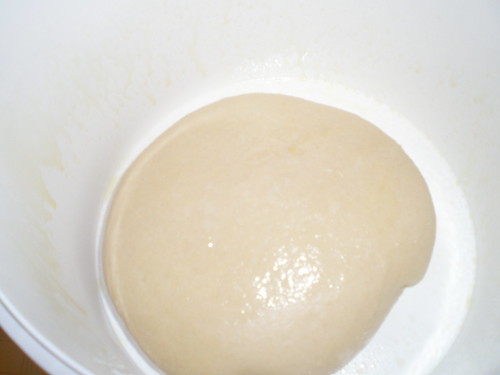
By morning, the starter has doubled and softened into this:
The starter is weighed out and mixed with water, then allowed to sit for 30 minutes to soften and dissolve.
The rest of the dough is mixed, kneaded, and set aside to for the first stage of bulk fermentation.
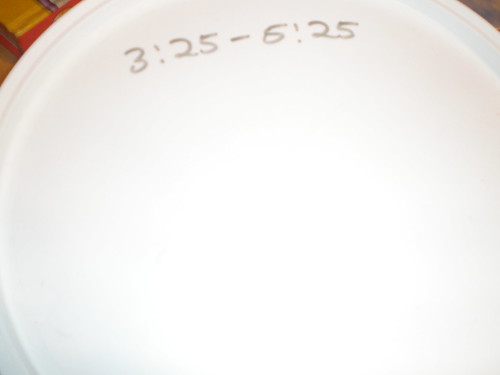
I mark the time on the outside of the bucket with a dry erase marker.
After an hour and a half, the dough was ready for the first of what Rose calls “business letter folds”. (These are more commonly referred to as “stretch and folds”).
Note that I do not put any extra flour on my marble board. The bucket the dough rose in was sprayed with olive oil, and there’s just enough oil clinging to the dough to keep it from sticking. After the stretch and folds, the dough undergoes a second bulk fermentation.
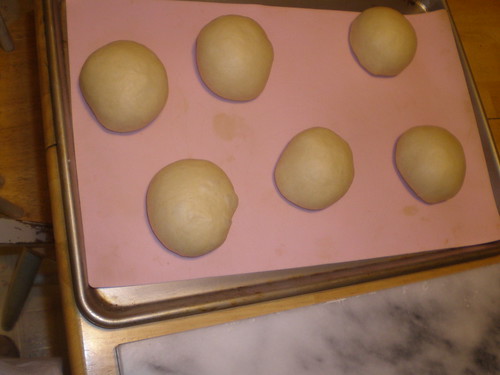
For a single challah, I divide the dough into six equal balls. Each ball is flattened and rolled tightly into a tapered rope (Aaaggghhh! I forgot to take a picture of the rope). Note that before rolling it out into a rope I tightly pinch the seam just as you would do for a baguette.
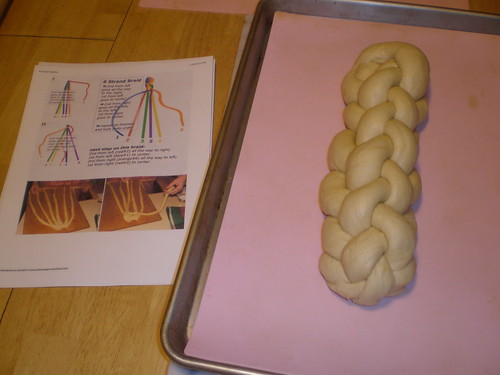
This challah is a six strand braid. I always need to follow directions for a six strand braid, I can never remember how to do it.
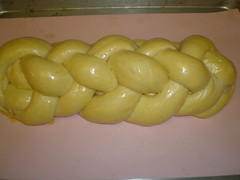
I give the dough two egg washes. One immediately after shaping, the second after the dough has risen, right before baking.
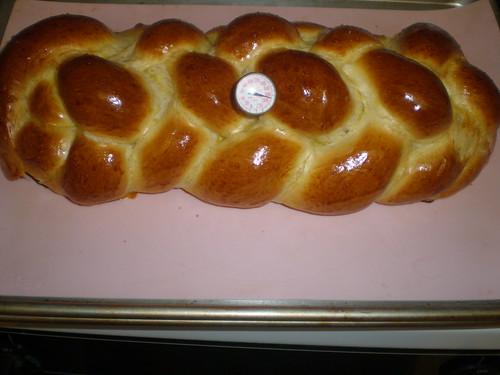
The challah is ready when it’s nicely browned and the inner temperature measures at least 185 degrees Fahrenheit.
Sorry, no crumb shot—this challah will be frozen until the potluck on February 5th. I wrapped it tightly in foil and then plastic cling wrap before freezing. On the appointed day, I will remove the challah from the freezer in the morning, leaving it tightly wrapped. It will thaw slowly on the counter. The theory behind leaving it wrapped is that the condensation from the thawing bread will be reabsorbed by the bread after thawing is complete. This way the thawed bread will not be dried out. For that freshly baked taste, place the challah—loosely wrapped in foil--in a medium oven (320 – 350) for 10 to 15 minutes.
Taken one step at a time, nothing here is difficult—and the results are spectacular! Give it a try.
[Submitted to Wild Yeast's Blog for her Yeast Spotting Page]
This challah has a great flavor, a light and airy crumb, and the dough is easy to work with. This challah is made with a firm sourdough starter as a sort of pate fermente (old dough) to condition the dough, giving it more moisture, a longer shelf life, and great elasticity.
I usually make this dough about once a month and shape the batch of dough into four small challahs for future Shabbat dinners. This size is just perfect for our family at dinner. The larger challah above was made for a religious school pot luck dinner.
This giant seeded challah was made from a double recipe for a bar mitzvah. This is the maximum size my oven and baking sheets can handle.
I took pictures this time of almost all the steps:
This is how my firm starter looks when freshly fed and ready to be refrigerated:
I feed 20 grams of old starter with 40 grams of water and 60 grams of flour (1:2:3 feeding ratio) and knead it until the flour is well incorporated. Then it goes into the fridge for up to a month.
This is how the starter looks after a month in the fridge. I take it out the evening before baking and let it sit on the counter until morning.
By morning, the starter has doubled and softened into this:
The starter is weighed out and mixed with water, then allowed to sit for 30 minutes to soften and dissolve.
The rest of the dough is mixed, kneaded, and set aside to for the first stage of bulk fermentation.
I mark the time on the outside of the bucket with a dry erase marker.
After an hour and a half, the dough was ready for the first of what Rose calls “business letter folds”. (These are more commonly referred to as “stretch and folds”).
Note that I do not put any extra flour on my marble board. The bucket the dough rose in was sprayed with olive oil, and there’s just enough oil clinging to the dough to keep it from sticking. After the stretch and folds, the dough undergoes a second bulk fermentation.
For a single challah, I divide the dough into six equal balls. Each ball is flattened and rolled tightly into a tapered rope (Aaaggghhh! I forgot to take a picture of the rope). Note that before rolling it out into a rope I tightly pinch the seam just as you would do for a baguette.
This challah is a six strand braid. I always need to follow directions for a six strand braid, I can never remember how to do it.
I give the dough two egg washes. One immediately after shaping, the second after the dough has risen, right before baking.
The challah is ready when it’s nicely browned and the inner temperature measures at least 185 degrees Fahrenheit.
Sorry, no crumb shot—this challah will be frozen until the potluck on February 5th. I wrapped it tightly in foil and then plastic cling wrap before freezing. On the appointed day, I will remove the challah from the freezer in the morning, leaving it tightly wrapped. It will thaw slowly on the counter. The theory behind leaving it wrapped is that the condensation from the thawing bread will be reabsorbed by the bread after thawing is complete. This way the thawed bread will not be dried out. For that freshly baked taste, place the challah—loosely wrapped in foil--in a medium oven (320 – 350) for 10 to 15 minutes.
Taken one step at a time, nothing here is difficult—and the results are spectacular! Give it a try.
[Submitted to Wild Yeast's Blog for her Yeast Spotting Page]
Subscribe to:
Posts (Atom)